# Quick Guide
# STEP1. Sign up for free
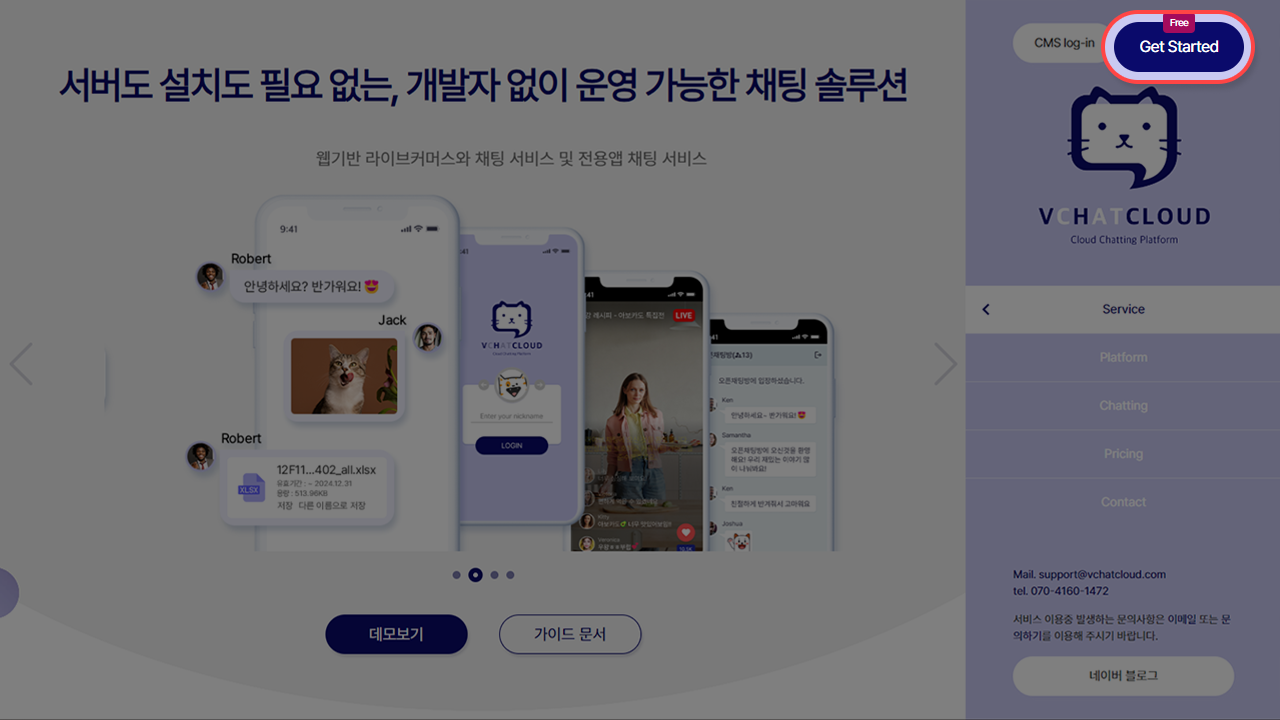
Go to the first page of vchatCloud and click the Free Use button (opens new window) at the top
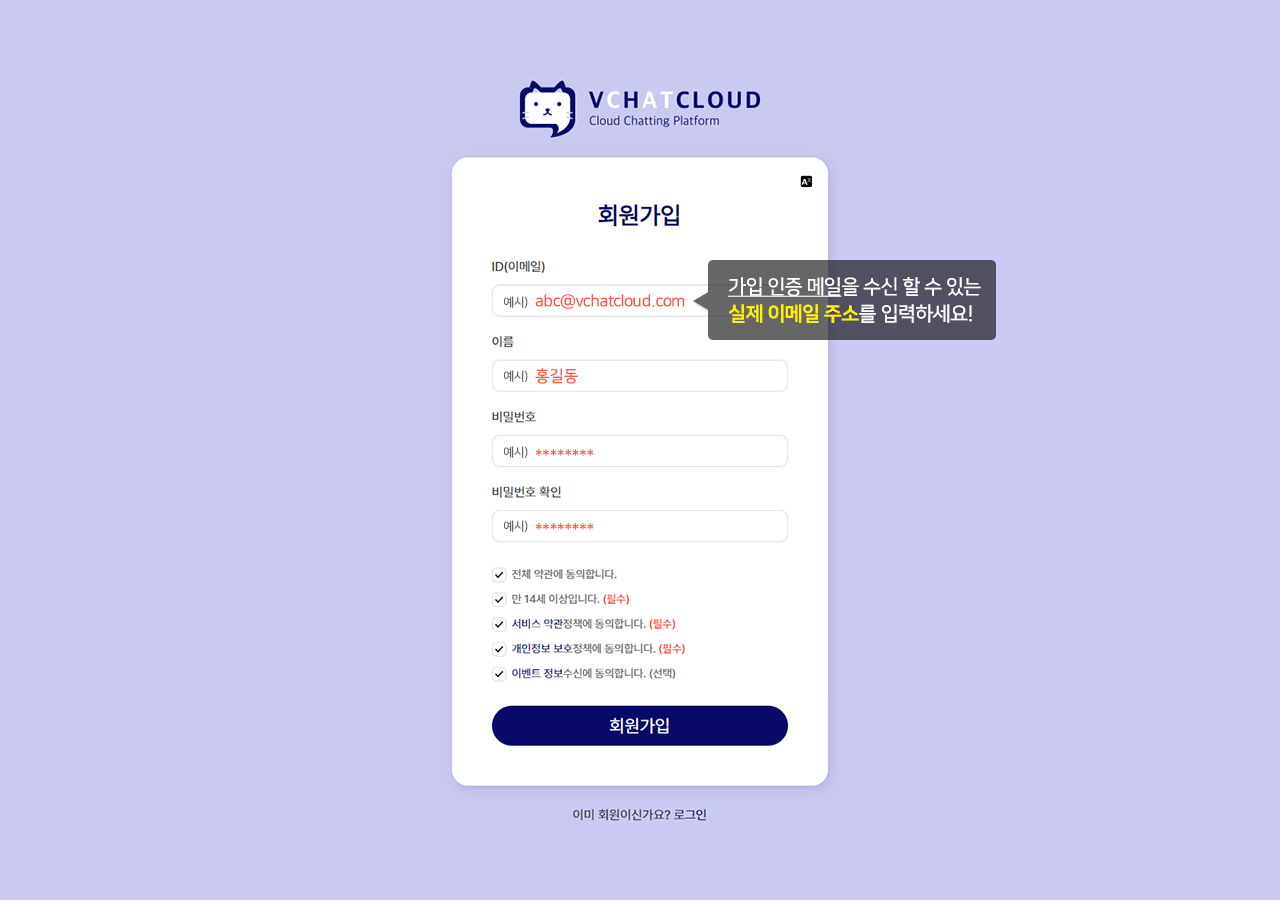
In the Sign up form, email address (actual email address where you can receive authentication email), name, password
and enter verify password and accept the terms and conditions.
Please complete the membership registration.
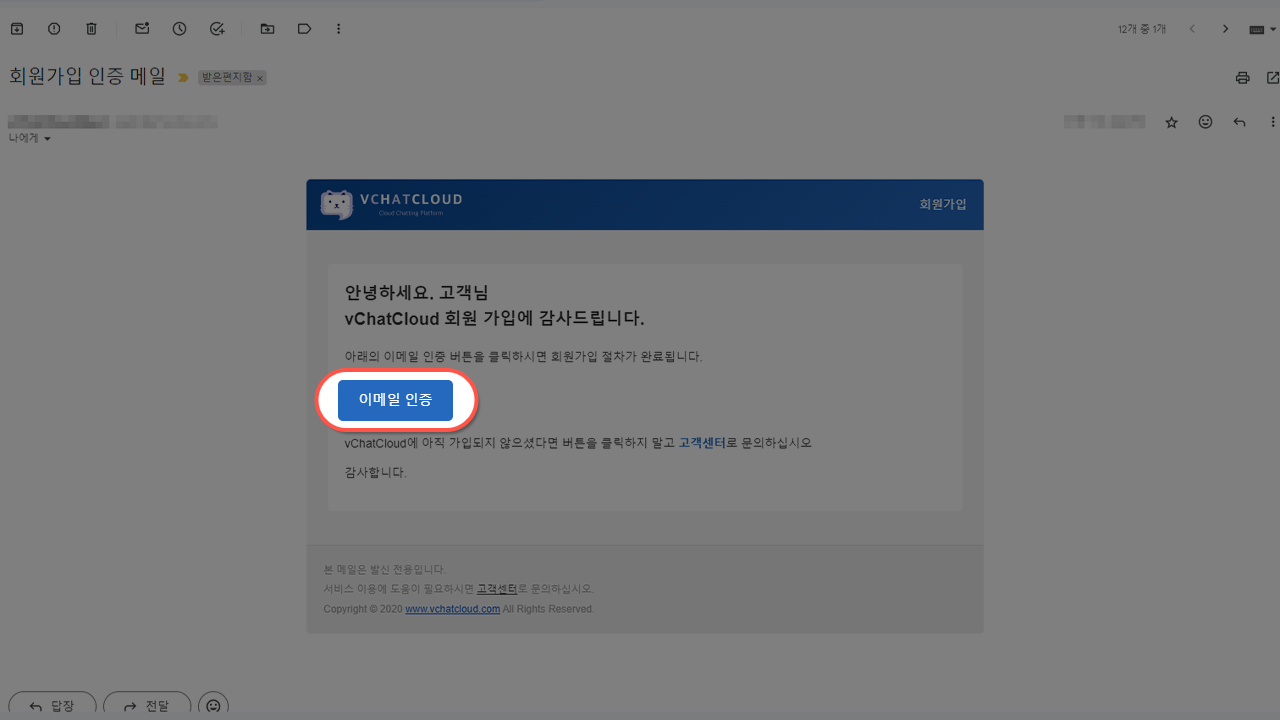
A confirmation email will be sent to the registered email address.

Register as a member by clicking the "here" link in the body of the verification confirmation email The Membership registration is complete.
# STEP2. Open a chat room
Click the Login (opens new window) button at the top of vchatCloud's first page.
Please log in with the email and password you registered when registering as a member.

Click Chat Room Management > Chat Room List on the left menu.
Click the Open Chat Room button at the top right.
After entering the chat room title, click the Create button.
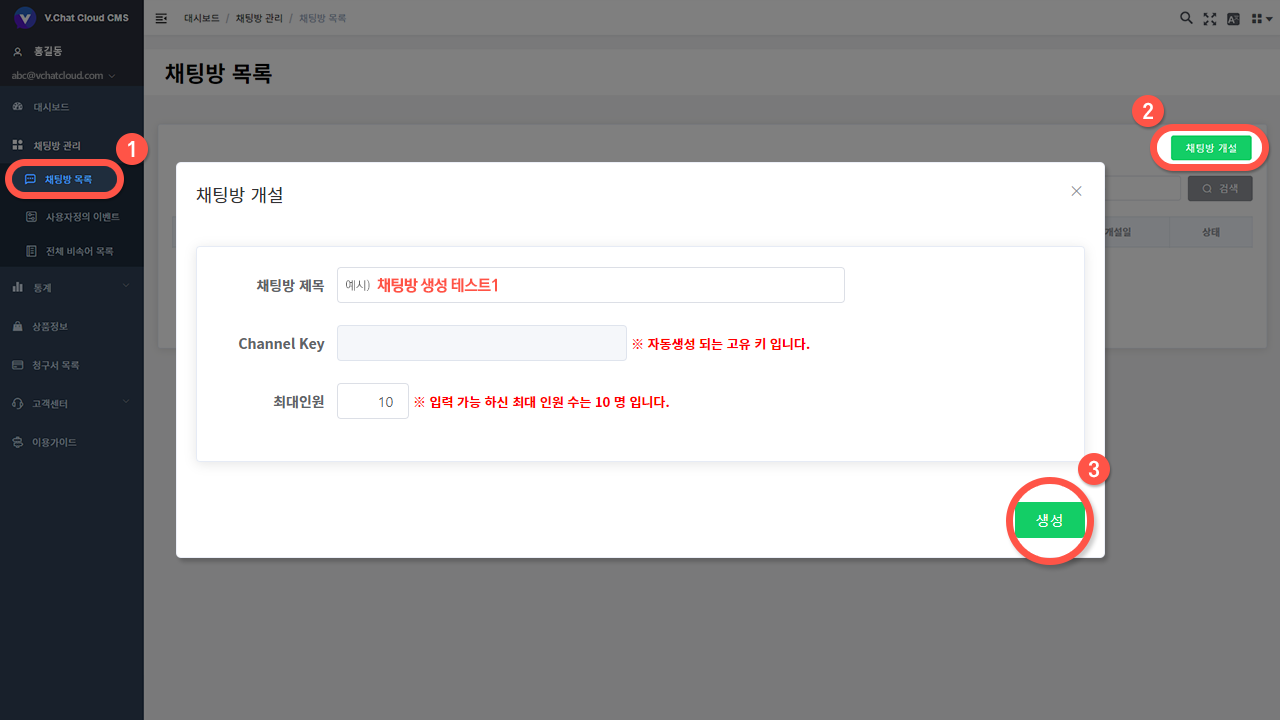
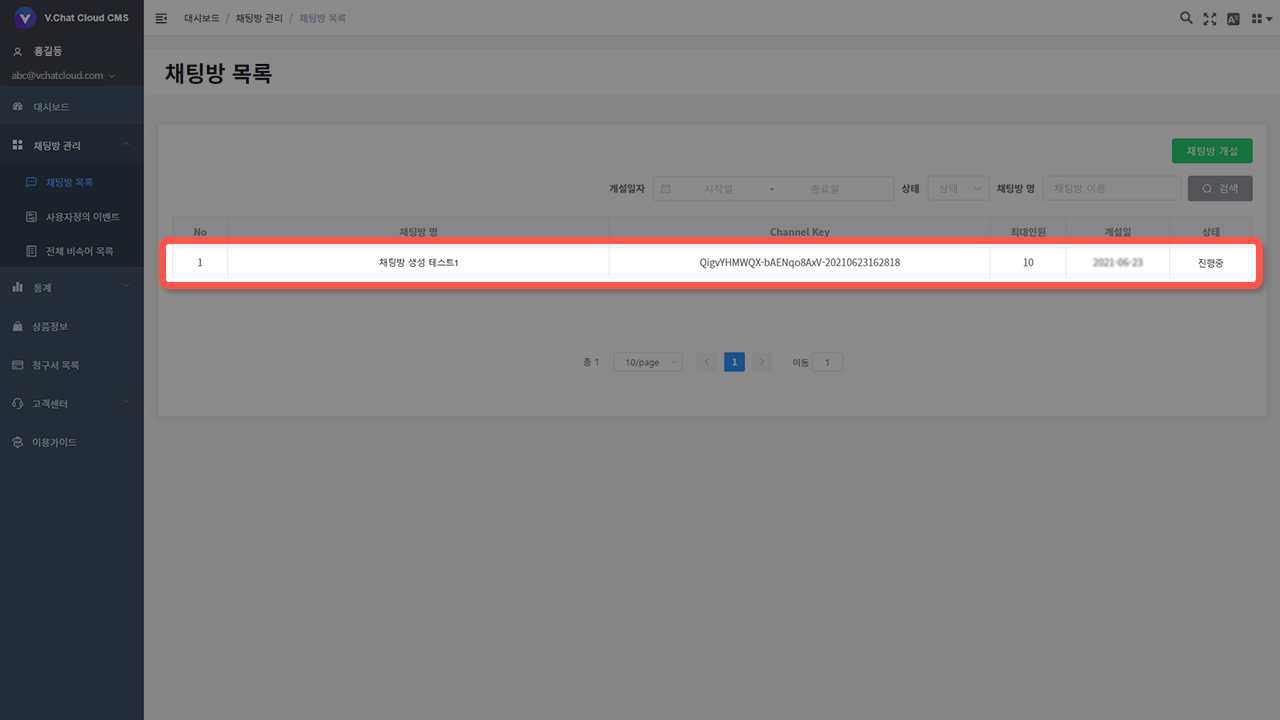
If it was exposed on the chat room list screen, the chat room was created normally.
# STEP3. Create & Run sample app
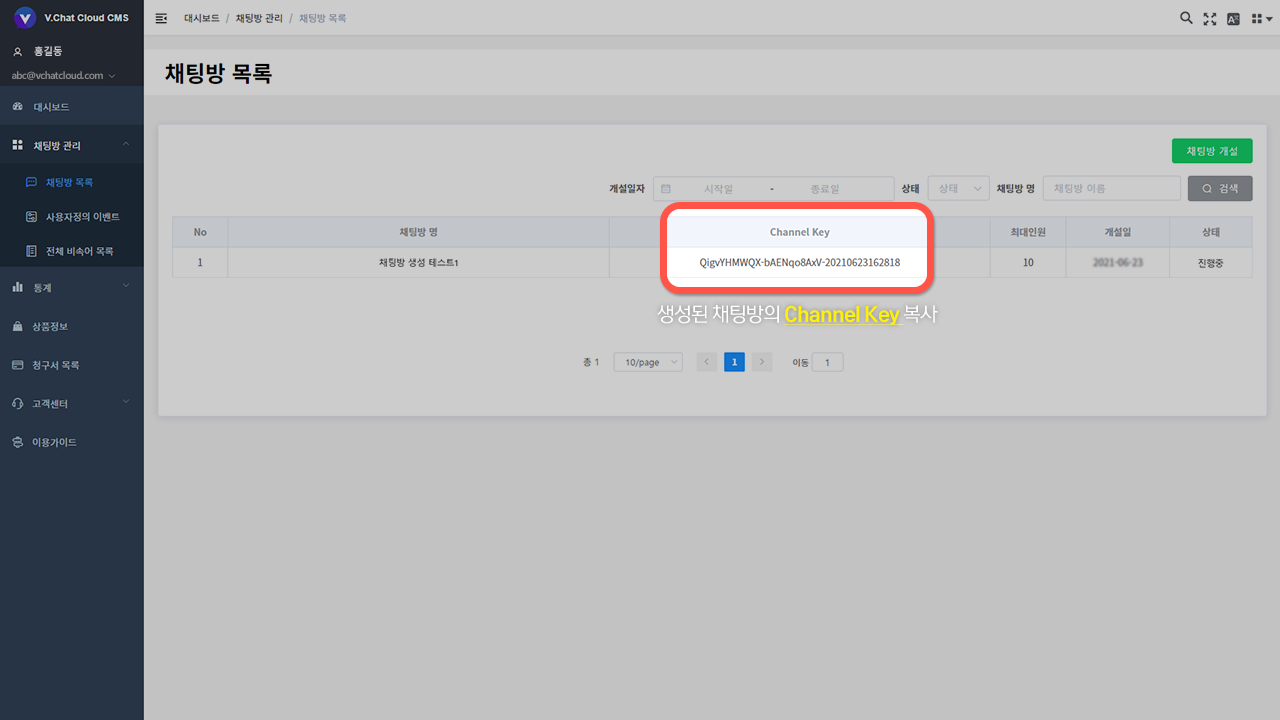
Please copy the Channel Key of the chat room you opened and write it down separately.
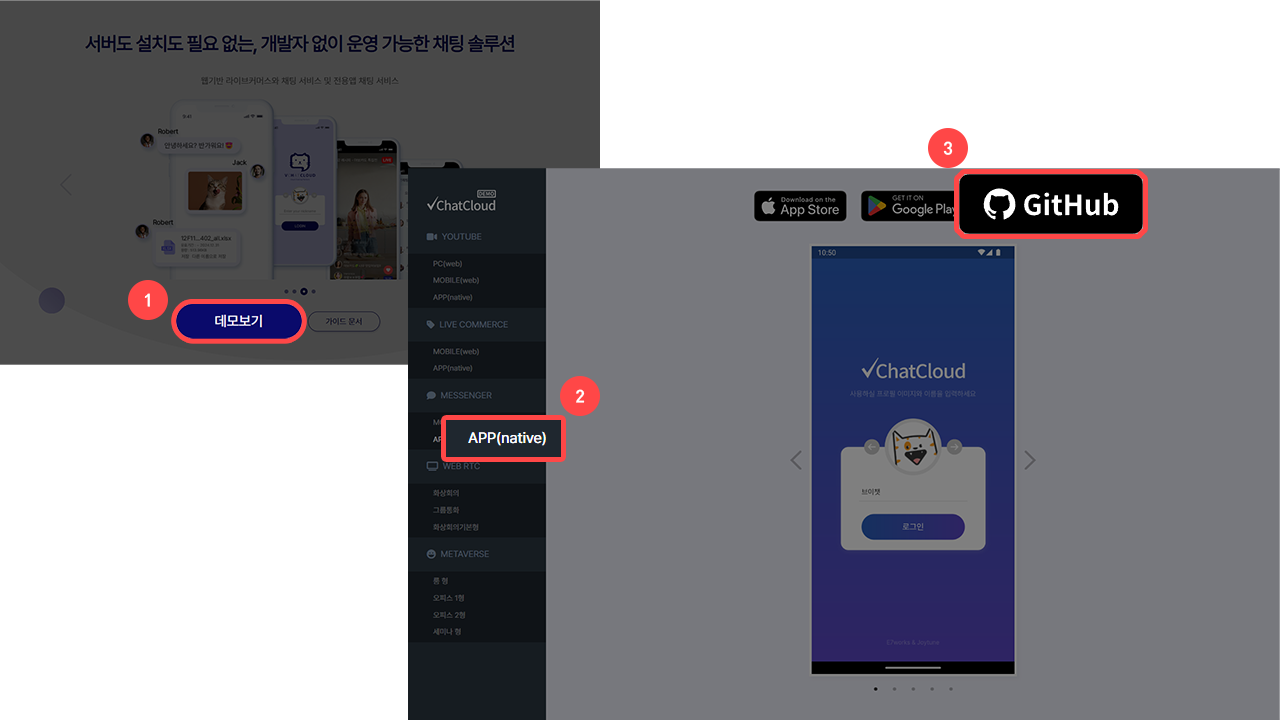
Click the demo button on the main website to display the pop-up.
Click App(native) to move to the left menu and click the GitHub button to move to the GitHub site.
# Source code 💾
- iOS Kakao Type (opens new window)
- iOS Live Commerce Type (opens new window)
- iOS Youtube Type (opens new window)
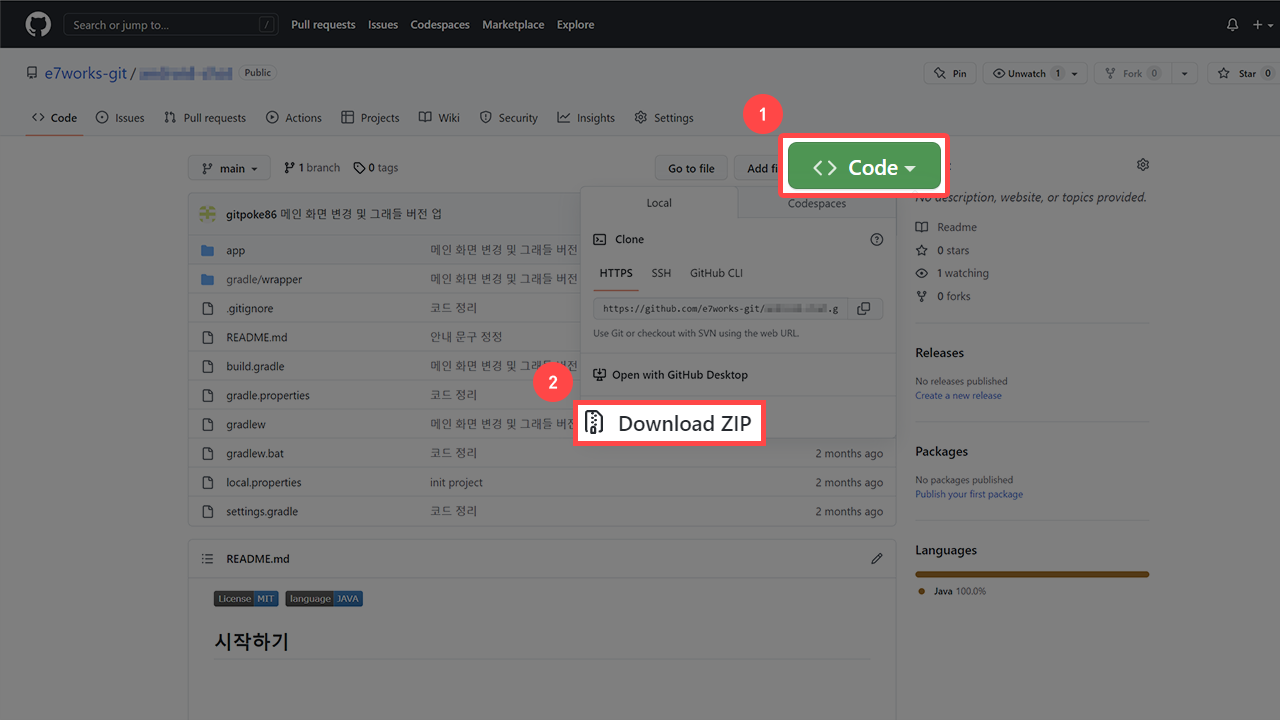
Go to the link and click <> Code at the top right to expose the pop-up.
After that, click the Download ZIP button at the bottom to download it.
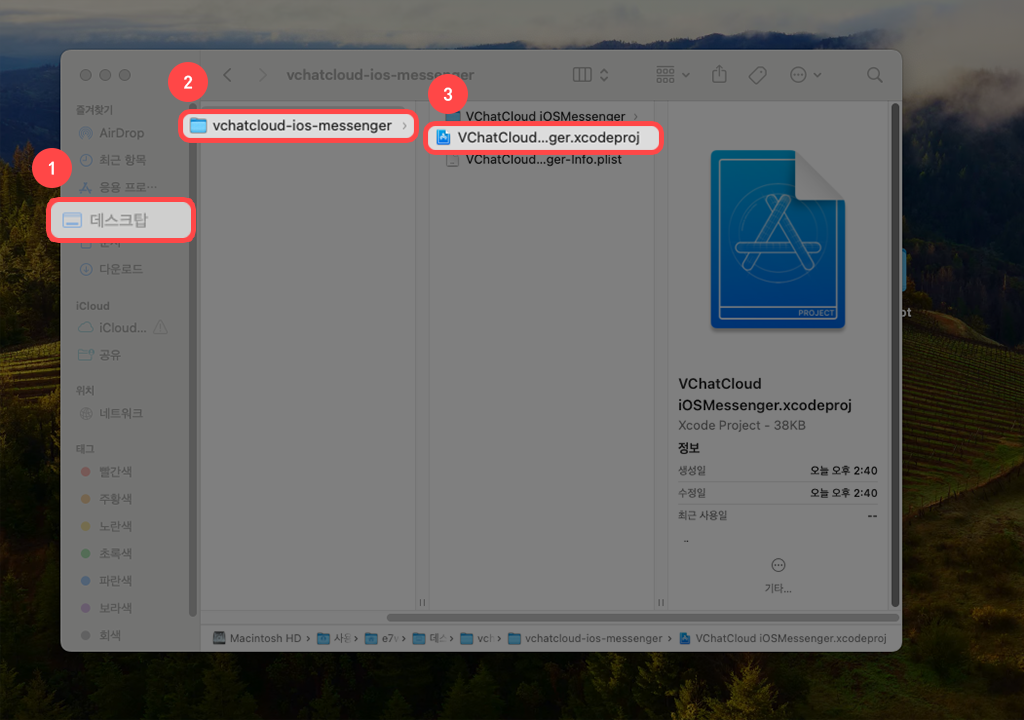
Go to the downloaded file path and open <Project Name>.xcodeproj.
You now need to check the Device before you can run the app.
There is a way to check by connecting an iOS device to your Mac, and you can check it using the simulator in XCode.
Select the device you want to use and make sure that the ▶ button on the upper left is active.
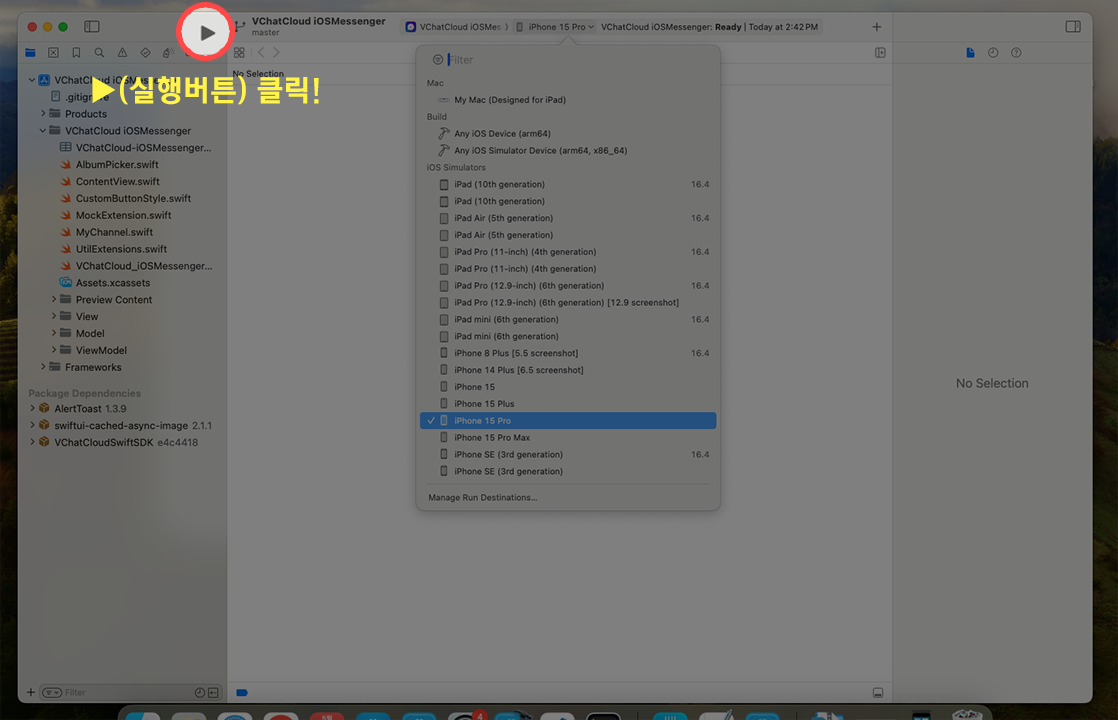
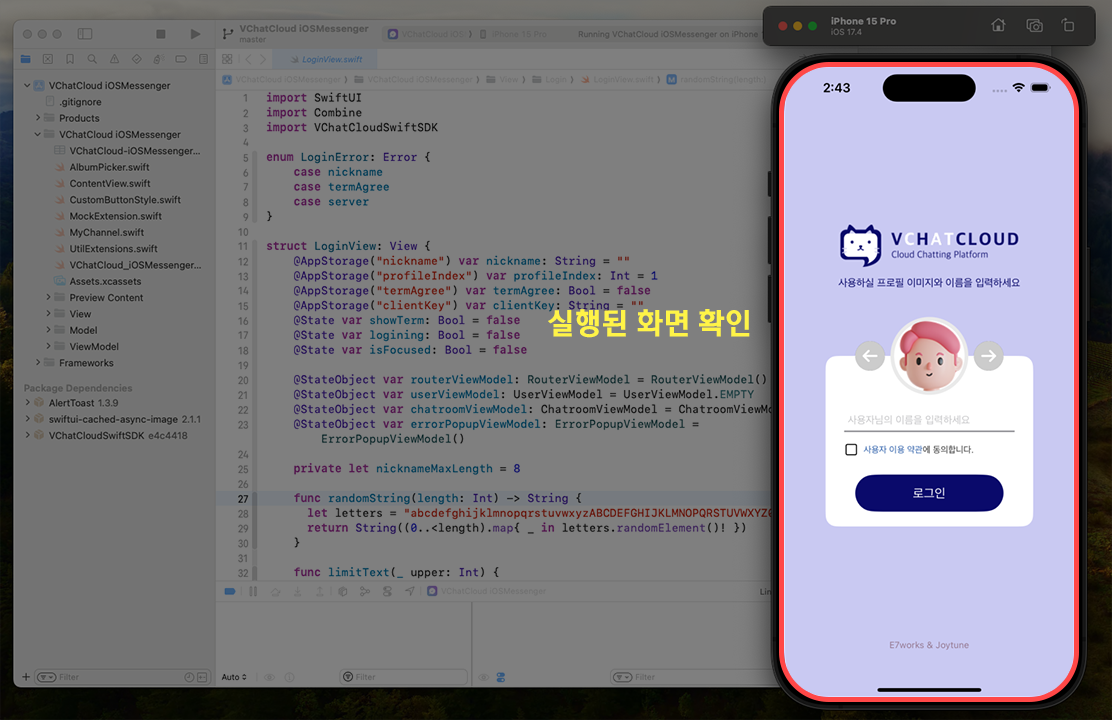
▶ If you click the button, XCode will automatically proceed with the build and install and run on the selected device.
Overview →